
 06 May. 2025
 This is the Part II of our articles in AWS. The previous article covered the part of data lake formation, data analytics and visualization. In this article, we’ll explore ML model training using Amazon SageMaker. To train the model, we’ll be using the same Customer Churn Dataset used in Part I.
You can use this link to go through Part I if you haven’t done so already.
By the end of this article, you’ll be able to build and train an end-to-end ML model using SageMaker.

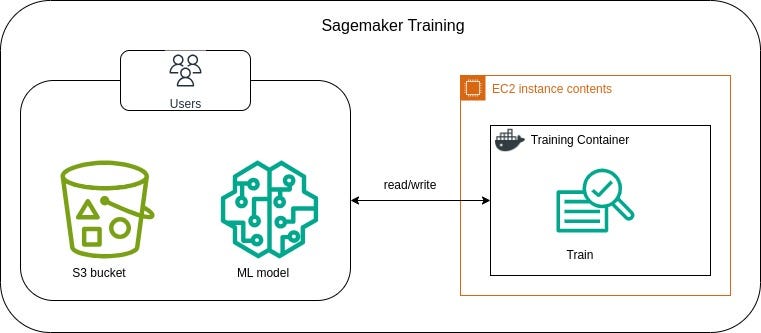
Amazon Sagemaker
Amazon SageMaker is a fully managed machine learning service provided by Amazon Web Services (AWS) that enables to build, train, and deploy machine learning models at scale. It provides a complete set of tools for every step of the machine learning workflow.
Due to its ease of use and scalability, it is one of the most popular services used for ML tasks. Hence, we’ll be leveraging the services provided by SageMaker to train our model.
Here, we will perform following steps for ML model training using SageMaker:
1. Create SageMaker notebook instance
2. Data extraction and Feature Engineering
3. Build and train an XGBoost model
4. Evaluate the trained model
1. Create SageMaker notebook instance
SageMaker notebook instance is a fully managed infrastructure and pre-configured environment for ML tasks. Hence, we’ll be creating SageMaker notebook instance and use it for building and training ML model.
1.1 Sign in to the Amazon Management Console.
1.2 By searching “SageMaker” on the search bar, go to Amazon SageMaker.

1.3 Under Notebook, go to Notebook Instances and click on Create notebook instance to create a new notebook instance.

- Give name to the notebook instance.
- Choose instance type.
Instance type refers to the specific configuration of virtual hardware that you can choose for notebook environment. Different instance types provide varying amounts of CPU, GPU, memory, and network performance, catering to different needs for compute power and storage capacity.
Note: Cost varies according to the instance type. So, choose accordingly. Here, we will be usingml.t2.mediumwhich is the least expensive one and suffices for our purpose. - Choose an IAM role. If you haven’t created a role before or want to create a new role for this task, create a new IAM role. This is required for notebook instance to give permissions to call other services.
For example; we need to access S3 for reading data and storing model artifacts and IAM role is required to have read/write permissions over the S3 bucket. - Then create notebook instance.
We are leaving other fields as default for now.

It will take some time for the created notebook instance to become available for use. You can open Jupyter or JupyterLab after the “InService” is displayed under the “status” column as shown in the screenshot below.

You’ll be directed to a notebook environment where you can create a new .ipynbnotebook. To create a new .ipynb notebook, go to file and click on new.
You’re ready to dive into coding for training ML models now.
2. Data extraction and Feature Engineering
This is the first step of actual coding. First, we extract data from S3 bucket stored in Part I and perform feature engineering to make the data ready for training.
import pandas as pd
from sklearn.preprocessing import OneHotEncoder
import sagemaker, boto3, os

#data extraction
S3_uri = "s3://customer-churn-dataset/customer_churn_dataset-master.csv"
churn_data = pd.read_csv(s3_uri)
print(train_data.head())

#remove the column "CustomerID"
churn_data = churn_data.drop(columns=['CustomerID'])

#handle null or missing values
churn_data = churn_data.dropna()

#handle categorical features
categorical_cols = churn_data.select_dtypes(include=['object', 'category']).columns.tolist()
print(categorical_cols)

encoder = OneHotEncoder()

encoded_data = encoder.fit_transform(churn_data[categorical_cols]).toarray()
encoded_df = pd.DataFrame(encoded_data, columns=encoder.get_feature_names_out(categorical_cols))
churn_data.drop(columns=categorical_cols, inplace=True)

churn_data.reset_index(drop=True, inplace=True)

churn_data = pd.concat([churn_data, encoded_df], axis=1)

# split data into X and y
X = churn_data.drop('Churn', axis=1)
y = churn_data['Churn']

# split data into train and split
X_train, X_test, y_train, y_test = train_test_split(X, y, test_size=0.2)

# concatenate the features with labels
train = pd.concat([pd.Series(y_train, index=X_train.index,
                             name='Churn', dtype=int), X_train], axis=1)
test = pd.concat([pd.Series(y_test, index=X_test.index,
                            name='Churn', dtype=int), X_test], axis=1)

# save the data to csv
train.to_csv('train.csv', index=False, header=False)
test.to_csv('test.csv', index=False, header=False)

# store the data in s3
bucket = sagemaker.Session().default_bucket()
prefix = "customer_churn_prediction"
print(bucket)

train_path = boto3.Session().resource('s3').Bucket(bucket).Object(
    os.path.join(prefix, 'data/train.csv')).upload_file('train.csv')
test_path = boto3.Session().resource('s3').Bucket(bucket).Object(
    os.path.join(prefix, 'data/test.csv')).upload_file('test.csv')
Above code block performs following things:
2.1 Read data from s3.
Copy the s3 URI of the CSV by navigating to the file inside the S3 bucket.

2.2 Perform feature engineering
- Since the column “CustomerID” doesn’t provide any valuable information for training, it can be discarded.
- Any row with null or missing value is dropped from the dataframe.
- The dataset has categorical features too. Since all the categorical features present in this dataset are nominal, the categorical feature values are converted to numerical values using One-Hot-Encoding.
- Split the data to features and labels.
- Perform train-test split. Test set will be required to evaluate the performance of the trained model. Here, we are splitting the data in the ratio of 80:20 for train and test set respectively.
2.3 Store data in S3
- Align each dataset (train and test sets) by concatenating the features with the true labels.
- Save train and test sets to CSVs.
- Define S3 bucket to store the data. Here, we have used default bucket using the SageMaker Session object.
sagemaker.Session().default_bucket() - Upload data to S3 bucket using boto3 which is AWS SDK for python.
- The upload can be verified by running the following AWS CLI command:
You can also confirm if the data is uploaded by navigating to the folder “s3://your_bucket_name/customer_churn_prediction/data/” inside the S3 bucket. Make sure to use your default bucket name.
! aws s3 ls {bucket}/{prefix}/data --recursive

3. Build and train an XGBoost model
After doing feature engineering, the data is now ready to be used for training. Next step is to build and train model. Here, we’ll be using XGBoost model. We are working on binary classification problem to predict customer churn and XGBoost is a powerful model that implements a gradient boosting framework for optimizing the performance.
from sagemaker.debugger import Rule, ProfilerRule, rule_configs
from sagemaker.session import TrainingInput

#create model estimator
region = sagemaker.Session().boto_region_name
print(f"AWS Region: {region}")

role = sagemaker.get_execution_role()
print(f"Role: {role}")

s3_output_location=f's3://{bucket}/{prefix}/model'

container=sagemaker.image_uris.retrieve("xgboost", region, "1.2-1")

xgb=sagemaker.estimator.Estimator(
    image_uri=container,
    role=role,
    instance_count=1,
    instance_type='ml.m4.xlarge',
    volume_size=5,
    output_path=s3_output_location,
    sagemaker_session=sagemaker.Session(),
    rules=[
        Rule.sagemaker(rule_configs.create_xgboost_report()),
        ProfilerRule.sagemaker(rule_configs.ProfilerReport())
    ]
)

#hyperparameters for the model
xgb.set_hyperparameters(
    max_depth = 5,
    eta = 0.2,
    gamma = 4,
    min_child_weight = 6,
    subsample = 0.7,
    objective = "binary:logistic",
    num_round = 1000
)

#make training input
train_path = f's3://{bucket}/{prefix}/data/train.csv'
test_path = f's3://{bucket}/{prefix}/data/test.csv'

train_input = TrainingInput(train_path, content_type="csv")
test_input = TrainingInput(test_path, content_type="csv")

#launch training job
xgb.fit({"train": train_input, "validation": test_input}, wait=True)
To train the model, following steps are performed:
3.1 Create a model estimator using Estimator class. Here, we have providing the following parameters:
image_uri = containerwe have retrieved the training container image URI usingsagemaker.image_uris.retrieve.role = roleIAM role specified while creating notebook intance.intance_count = 1Number of Amazon EC2 ML compute instances to use for model training.intance_type = 'ml.m4.xlarge'Type of Amazon EC2 ML compute instances to use for model training.
“ml.m4.xlarge” instance has 4 CPUs and 16 GB of memory.volume_size = 55 GB of EBS storage volume to attach to the training instance.output_path= s3_output_locationThe location where training results and model artifacts are stored.sagemaker_session = sagemaker.Session()SageMaker session object that manages interactions with SageMaker API operations and other AWS service that the training job uses.rulesList of SageMaker Debugger rules.
create_xgboost_report()rule creates an model report including the model metrics.
ProfilerReport()rule creates a report regarding the EC2 compute resource utilization
These reports will be stored in the same s3output_path
3.2 Define hyperparameters for the model as required by XGBoost model.
3.3 Configure input data for training using TrainingInput class by providing s3 locations of train and test sets.
3.4 Launch training job by using fit method. Once you run the code, the model will start to train. Setting wait=True, it displays progress logs and waits until training is complete.


4. Evaluate the trained model
After the training has been completed, we can evaluate the trained model. Since we have used SageMaker Debugger built in rules, it will generate reports of our model metrics. The reports are stored in the s3 output_path provided while creating the Estimator of the model.
Copy the s3 URI by navigating to the file inside the s3 bucket and download the file in current directory as following.
evaluation_report_path = f"s3://sagemaker-us-east-1-684052882286/customer_churn_prediction/xgboost_model/sagemaker-xgboost-2024-05-15-01-51-18-753/rule-output/CreateXgboostReport/xgboost_report.html"

! aws s3 cp {evaluation_report_path} ./
The report xgboost_report.html contains the results of classification metrics like confusion matrix, accuracy, precision, recall and f1 score. The metrics for the model we trained are as follows:


Conclusion
In this article, we harnessed the integrated environment and efficient compute facilities provided by AWS SageMaker to build,train and evaluate ML models.
After completing both the parts, Part I and Part II, you have been equipped with skillset to fully leverage the AWS services to create data lake to store data, analyze and visualize the data to gain important insights, and train end-to-end ML model to make use of data stored in data lake for prediction. This can help to manage data and use it for decision making process.
References
- https://docs.aws.amazon.com/sagemaker/
- https://www.amazonaws.cn/en/getting-started/tutorials/build-train-deploy-machine-learning-model-sagemaker/
 Filter