
 06 May. 2025
 This is the first part of a three-part series for setting up Kafka to publish data from Elasticsearch to Kafka topic; this topic will be consumed by Neo4j. The first part helps you set up Kafka locally. Thesecond partwill talk about how to set up Elasticsearch to publish data to Kafka topics. Finally, thethird partwill dwell on how to subscribe to a topic and consume the data using a connector.

What is Kafka?
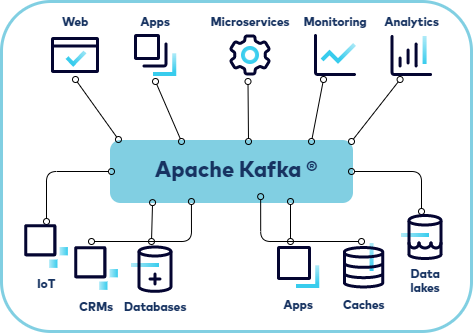
Kafka is an event streaming platform. Essentially, it considers any real-time data as an event with a source and a destination. Sometimes, our use cases require these events to be streamed to a specific location such as databases, log databases, or even multiple databases simultaneously. This is where Kafka comes in. We can use Kafka as a platform to ingest data from multiple sources and distribute it to whoever is subscribing to particular “topics”. The terminology is self-explanatory; topics are the data repositories that hold data after it is ingested from the source. Anyone or anything that wants the data has to subscribe to their own topic of interest.
Why Kafka?
Kafka is a distributed* event streaming platform that is mainly used for real-time data processing and streaming data. As it is distributed, it is designed to handle high volumes of data. Primarily, it is used to streamline data from one place(database/IOT devices) to another providing a unified platform to stream and process data in real-time.
*distributed: data stored inside topics are partitioned meaning the data inside the topic is spread over a number of buckets/Kafka brokers.
Quick facts about Kafka
- It is written in Scala and Java.
- The co-founder, Jay Kreps chose to name it “Kafka” because it is a “system optimized for writing”.
- Kafka was designed at LinkedIn to get around some traditional message brokers’ limitations and avoid the need to set up different message brokers for different point-to-point setups.https://shorturl.at/gvy03
How do I get started?
It’s often easy to get lost while getting started with Kafka as there are multiple managed services and local setup articles available and one might have a hard time navigating through these many options. One common practice includes starting out by setting up Kafka locally and then slowly moving towards managed services for Kafka. This series will do just that. This series will show you how to set it all up locally. Alternatively, here are two popular managed services for Kafka if one might want to go down that path.
- Confluent Kafka
- Amazon MSK(Managed Service for Kafka)
Key terms
- Brokers:A Kafka cluster is a group of multiple Kafka brokers. A Kafka broker is a server in the cluster that will send and receive the data. Since Kafka is distributed, the data inside the topics are distributed amongst multiple brokers. Every Kafka broker is a ‘bootstrap server’ as you need to connect to only one broker and the Kafka clients will know how to be connected to the entire cluster. (Reference:https://shorturl.at/uDR45)
- Topics:Kafka topics are like labeled folders for electronic messages. Imagine you have a giant board with different sections for different topics, like “Funny Jokes” and “Science Facts.” Each section is a topic. When you want to share a message, you put it in the right section (topic), so people interested in that topic can read it. It helps keep things organized and makes sure messages go to the right place. Kafka topics are multi-subscriber meaning a topic can have multiple consumers subscribing to the topic and the data written to it.
Each of them has equally good documentation, to begin with.
Let’s get our hands dirty now!
1. Download the Kafka file from the following link.
https://kafka.apache.org/downloads
Scroll to the Scala version.

Unzip the downloaded file andcdto the unzipped folder.
2. Start the zookeeper server and the Kafka server.
Zookeeper:
Start a new terminal session.
Use the following commands to start the zookeeper:
bin/zookeeper-server-start.sh config/zookeeper.properties
default zookeeper port number:2181
To change any configurations for the zookeeper, we can change the zookeeper.properties file.

kafka server:
Start a new terminal session.
Use the following commands to start the Kafka server:
bin/kafka-server-start.sh config/server.properties
Default Kafka server port number:9092
To change any configurations for the Kafka server, we can change the server.properties file.

3. Create a new topic.
Start a new terminal session.
bin/kafka-topics.sh --create --topic new-topic --bootstrap-server localhost:9092
4. Write some events to a topic.
bin/kafka-console-producer.sh --topic new-topic --bootstrap-server localhost:9092
log1
log2
5. Subscribe to the event to read the events written on the topic.
bin/kafka-console-consumer.sh --topic new-topic --from-beginning --bootstrap-server localhost:9092
log1
log2
Congratulations!You’ve created a small microservice architecture that can publish to a topic and read from the topic. Now, you can substitute the system that publishes the event with any system that you might have in mind (IOT devices, databases, etc.). You can play around to get familiar with the idea of running a Kafka server with different configurations. In the next chapter, we will discuss how to add an Elasticsearch connector to publish data from Elasticsearch’s index to the Kafka topic.
 Filter